


本記事はこれからBlenderを始める方に向けて、Blender Launcherの導入方法と活用術を丁寧に解説します
1.Blenderとは?
Blenderはオープンソースで開発されている無料の3DCGソフトです。モデリング、アニメーション、スカルプト、レンダリング、ビデオ編集、VFX、ゲーム制作など、幅広い機能を1つのアプリケーションで利用できます
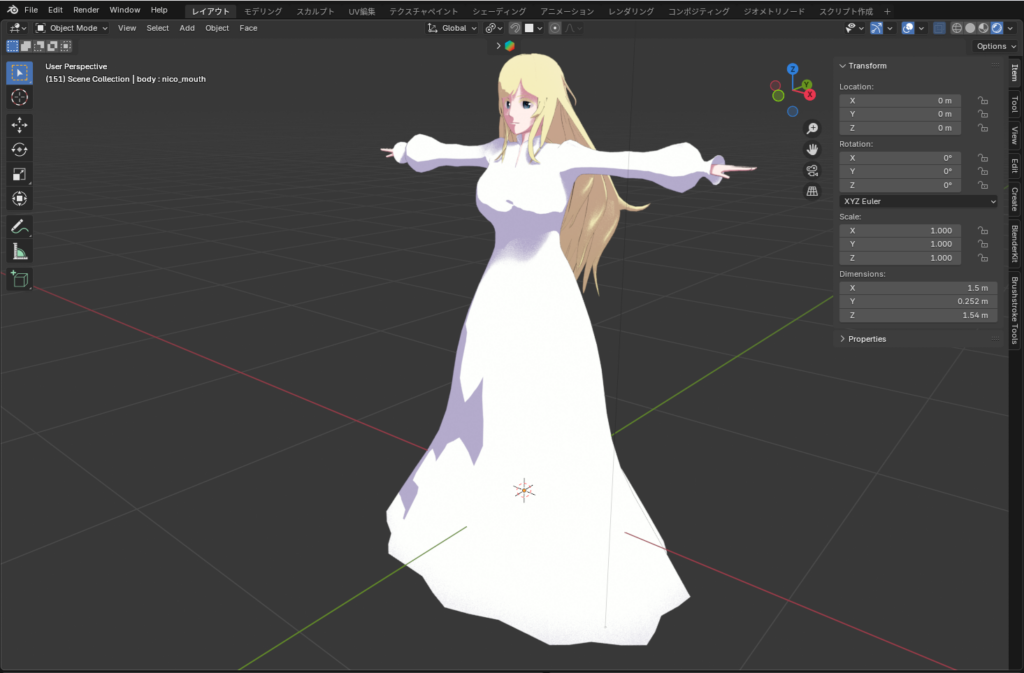
(下記画像は筆者が制作したモデルです)
2.Blender Launcherのすすめ
Blenderを公式サイトから直接ダウンロードするのではなく、Blender Launcherを導入することで複数のバージョンを手軽に管理・切り替えることができます
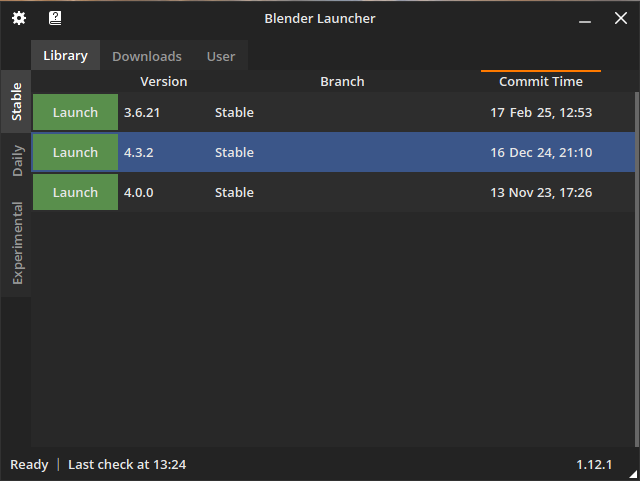
Blender Launcherとは?
Blender Launcherは、Blenderの異なるバージョンを簡単にインストール・起動・管理できる非公式の便利ツールです
導入をオススメする理由
・バージョンバージョン互換の壁を突破
YouTubeなどのチュートリアルで紹介されている手法が、自分のバージョンと異なることでうまく再現できないことがあります
・アドオンの対応状況に即応
Blenderは頻繁にアップデートされますが、すべてのアドオンが最新バージョンに対応しているとは限りません
3.Blender Launcherのインストール手順
英語表記が多いですが、基本的には “Next” をクリックして進めていくだけです。念のため、設定中の英語表記と翻訳も併記します
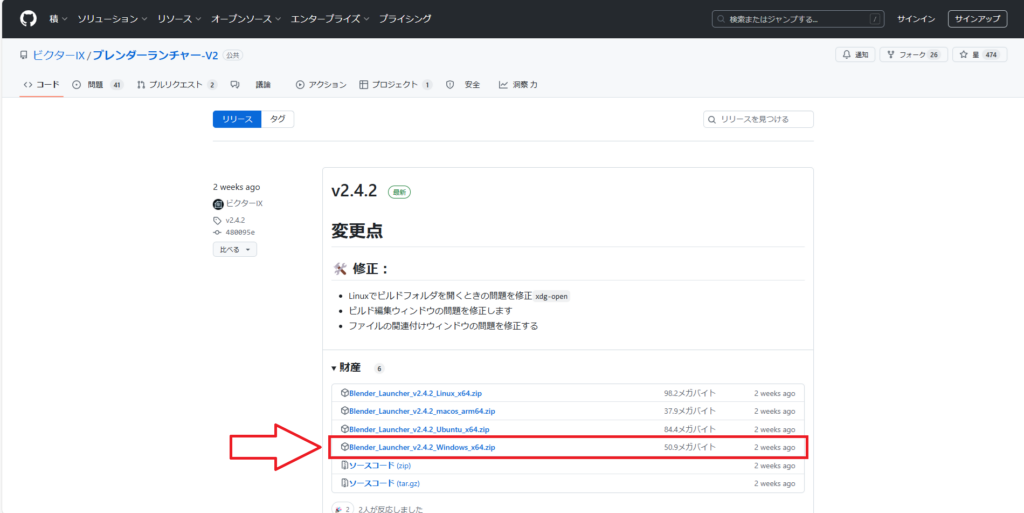
①GitHubからzip.をダウンロード
筆者の都合上windowsで解説します
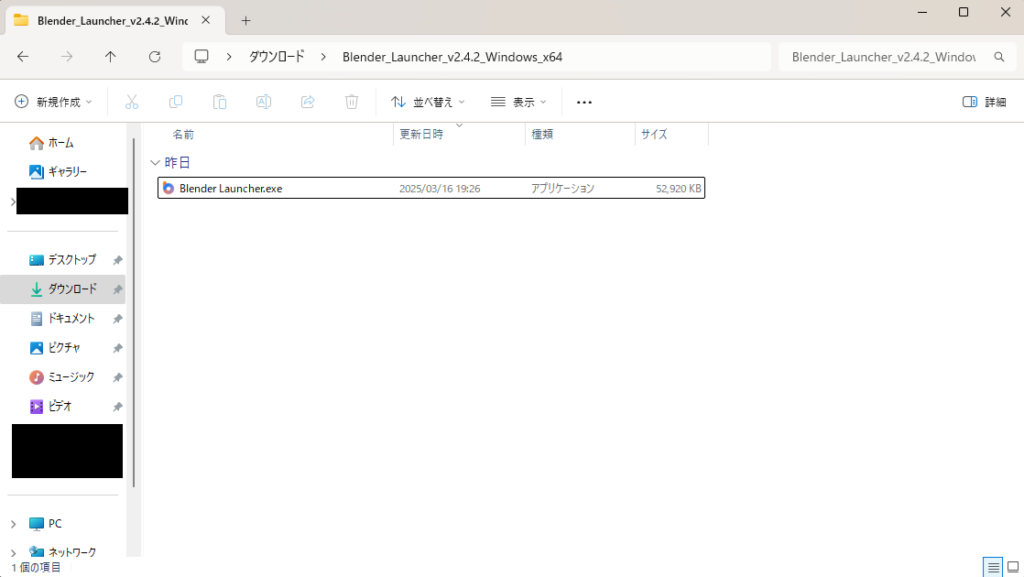
②解凍後、任意のフォルダに移動し実行ファイルを起動
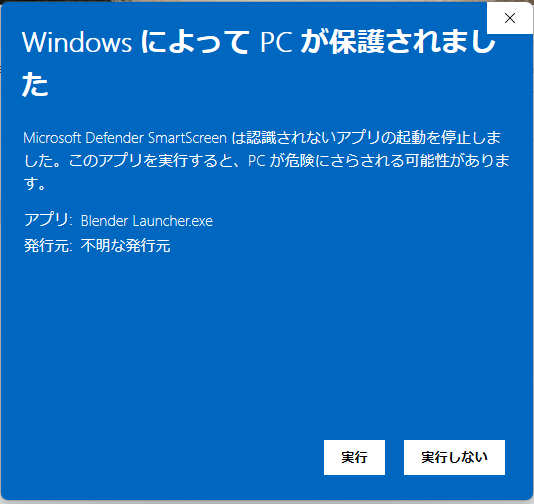
③警告が出ますがそのまま実行
④各種設定画面を順に進めます(Nextをクリック)
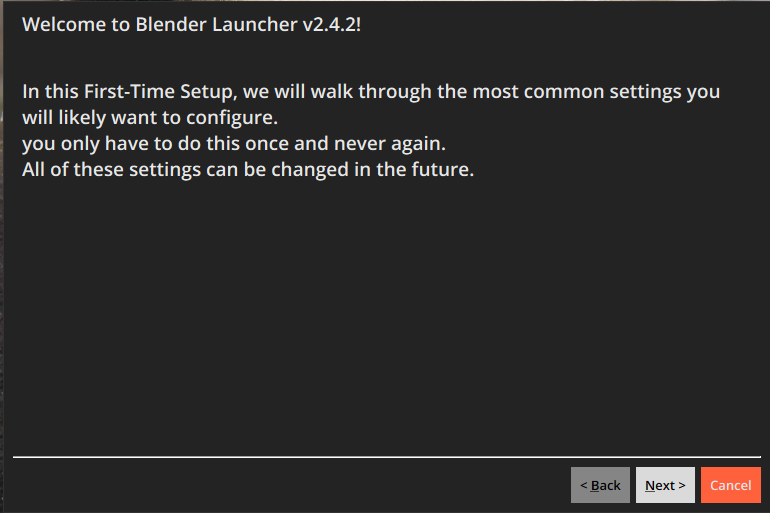
in this first-time setup, we will walk through the most common settings you will likely want to configure.
you only have to do this once and never again.
all of these settings can be changed in the future.
この初回の設定では、あなたが設定したいと思う最も一般的な設定を説明します。これを行うのは一度だけで、二度と行う必要はありません。これらの設定は将来的に変更可能です。(以下Google翻訳)
⑤任意のフォルダを選択してNextをクリック
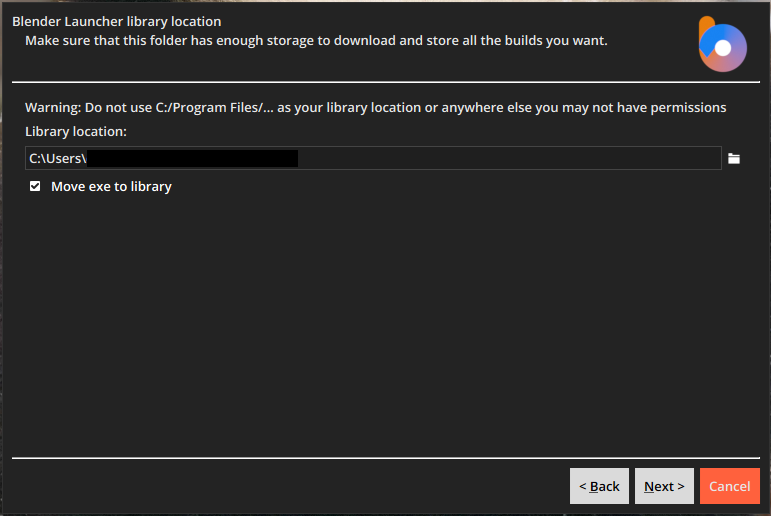
make sure that this folder has enough has enough storage to download and store all the builds you want
このフォルダーに、ダウンロードして保存したいすべてのビルドを保存するのに十分なストレージがあることを確認してください。
do not use C:/programs files/… as your library location or anywhere else you may not have permissions
C:/programs files/…をライブラリの場所として使用したり、権限がない可能性のある他の場所を使用しないでください。
move exe to library
exeをライブラリに移動する
⑥Nextをクリック
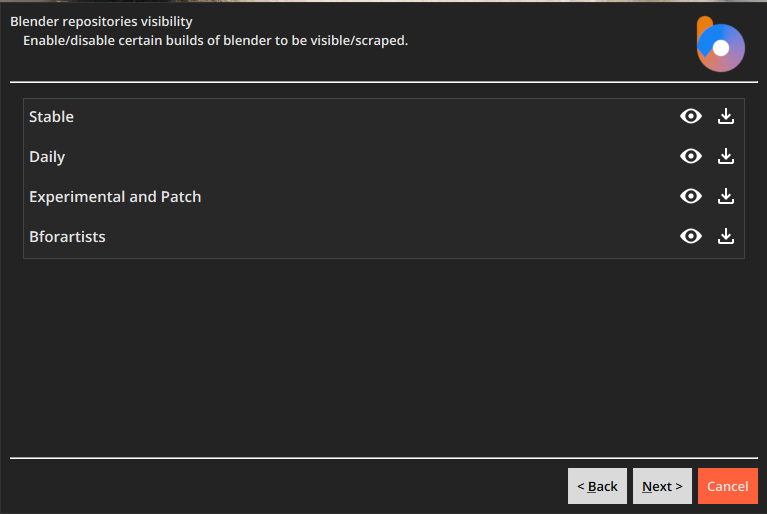
enable /disable certain builds of blender to be visible/scraped.
特定のBlenderビルドを表示/スクレイプできるように有効/無効にする。
⑦Nextをクリック
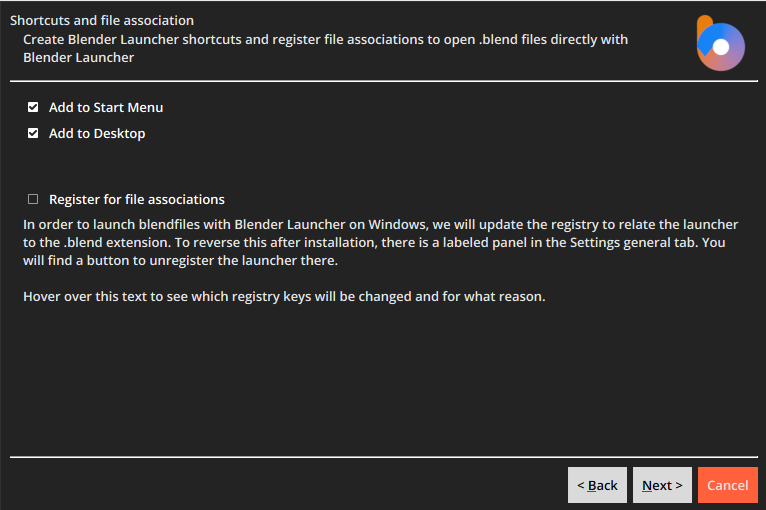
create blender launcher shortcuts and register file associations to open ,blend files directly with blender launcher
Blenderランチャーのショートカットを作成し、blendファイルをBlenderランチャーで直接開くためのファイル関連付けを登録します
add to start menu
スタートメニューに追加する
add to desktop
デスクトップに追加
register for file associations
ファイル関連付けに登録する
in order to launch blend files with blender launcher on windows, we will update the registry to replate the launcher to the ,blend extension. to reverse this after installation, there is a labeled panel in the settings general tab. you will find a button to unregister the launcher there.
WindowsでBlenderランチャーを使用して.blendファイルを起動するために、レジストリを更新してランチャーを.blend拡張子に置き換えます。インストール後にこれを元に戻すには、設定の一般タブにラベル付きのパネルがあります。そこにランチャーの登録を解除するボタンがあります。
⑧Nextをクリック
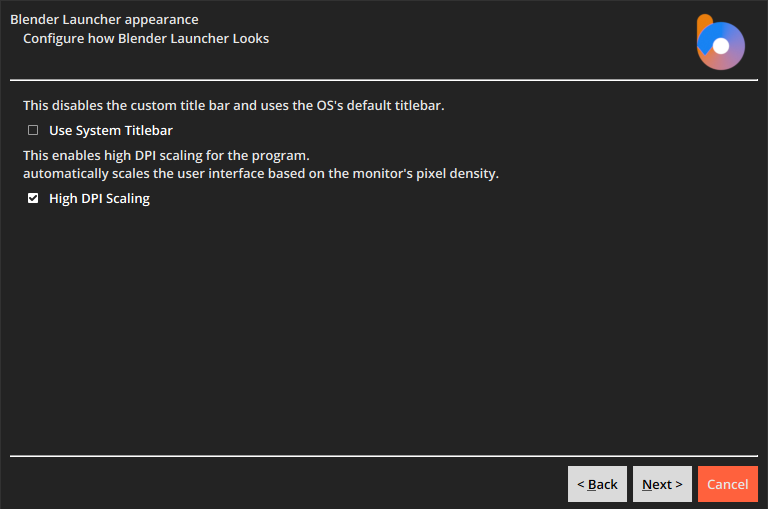
configure how blender launcher looks
ブレンダーランチャーの外観を設定する
this disables the custom title and uses the os’s default titlebar.
これによりカスタムタイトルが無効になり、OSのデフォルトのタイトルバーが使用されます。
use system titlebar
システムタイトルバーを使用します。
this enables high dpi scaling for the progaram.
autimatically scales the user interface based on the monitor’s pixel denisty.
これによりプログラムの高DPIスケーリングが有効になります。
モニターのピクセル密度に基づいてユーザーインターフェースが自動的にスケーリングされます。
high dpi scaling
高DPIスケーリング
⑨Fnishをクリック
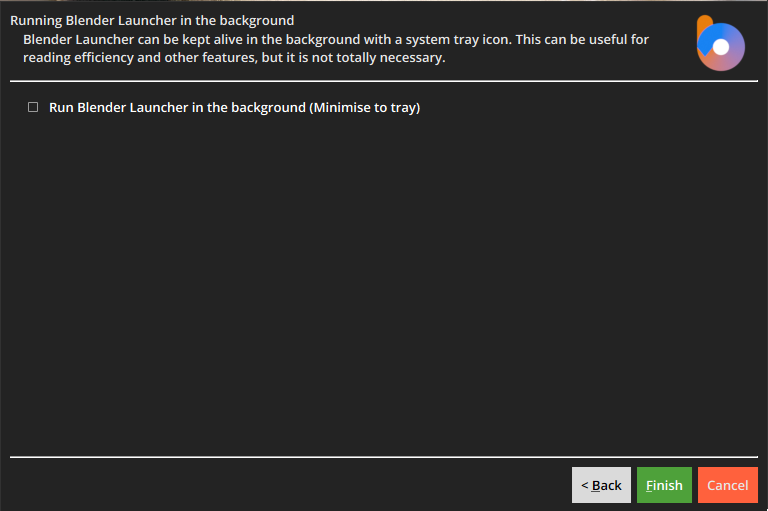
blender launcher can be kept alive in the background with a system tray icon.
ブレンダーランチャーは、システムトレイアイコンでバックグラウンドに常駐させることができます。
this can be useful for reading efficiency and other features, but it is not totally necessary.
これは、読み取り効率やその他の機能に役立ちますが、必ずしも必要ではありません。
run blender launcher in the background(minimise to tray)
ブレンダーランチャーをバックグラウンドで実行する(トレイに最小化)
⑩エラーが表示されることがありますが、基本的に問題なく使用可能です

an error occured during setup
セットアップ中にエラーが発生しました
finished page “welcome to blender launcher v2.4.2!”
ページ「Blender Launcher v2.4.2へようこそ」が終了しました!
finished page “blender launcher library location”
ページ「Blender Launcherライブラリの場所」が終了しました
finished page “blender repositories visibility”
ページ「Blenderリポジトリの可視性」が終了しました
err occurred during page “shortcuts and file association”!
ページ「ショートカットとファイルの関連付け」でエラーが発生しました!
traceback (most recent call last):
file “widgets\onboarding_setup\wizard_pages.py”,line284, inevaluate
file”modules\shortcut.py”, line207, in generate_program_shortcut
トレースバック(最も最近の呼び出しが最後):
ファイル「widgetsonboarding_setupwizard_pages.py」、行284、評価中
ファイル「modulesshortcut.py」、行207、プログラムショートカットを生成中
attributeerror:’str’object has no attribute ‘with_suffix’
AttributeError: ‘str’オブジェクトには’with_suffix’属性がありません
during handing of the above exeption occurred:
上記の例外の処理中にエラーが発生しました:
tracebook(most recent call last):
file “windows\onboarding_window.py”, line53, in run
file “widgets\onboarding_setup\wizard_pages.py”, line 289, in evaluate
トレースバック(最も最近の呼び出しが最後):
ファイル「windowsonboarding_window.py」、行53、実行中
ファイル「widgetsonboarding_setupwizard_pages.py」、行289、評価中
exception:exceptions raised while generating desktop shortcuts:’str’ object has no attribute ‘with_suffix’
例外:デスクトップショートカットを生成中に発生した例外:’str’オブジェクトには’with_suffix’属性がありません
continue anyways?
続行しますか?
⑪完了
Blende Launcher立ち上がります
4.Blender Launcherの基本的な使い方
導入時の使い方
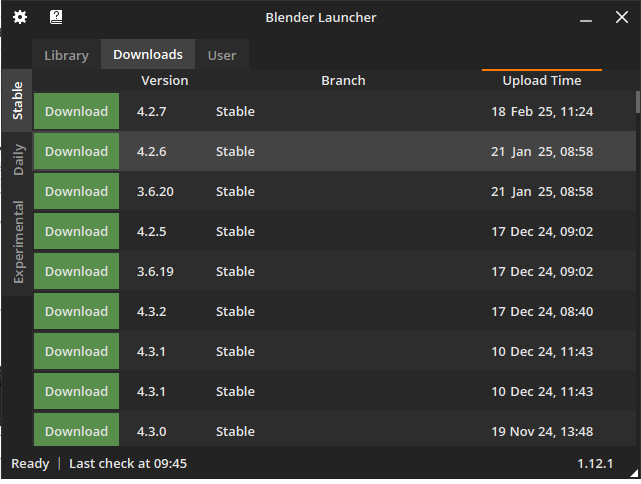
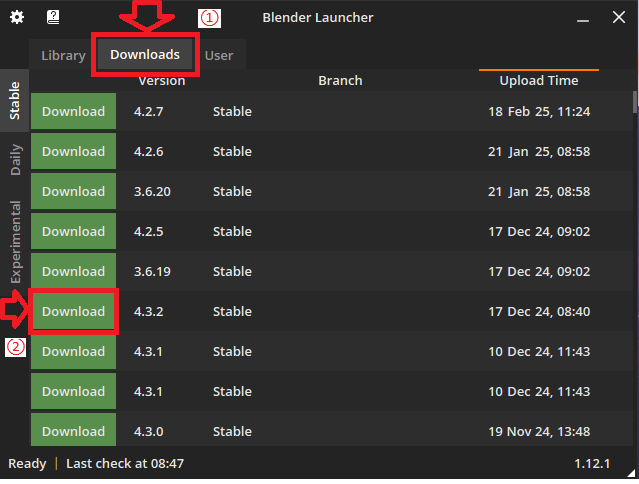
①Downloads のタブをクリック
②任意のBlenderバージョンのDownloadをクリック
③Libraryタブをクリック
④Launchをクリック
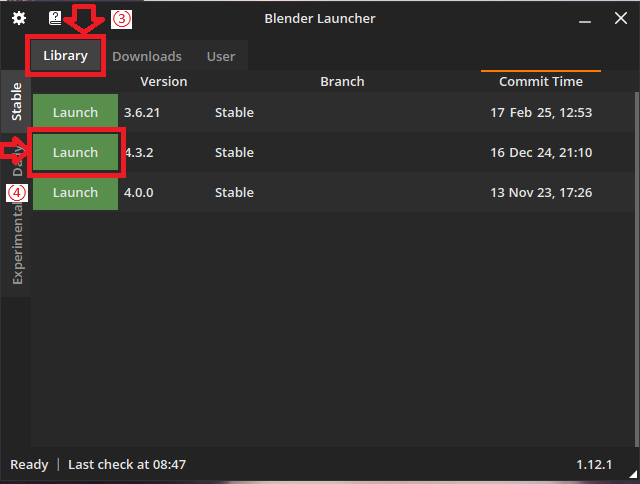
⑤Blenderが起動します

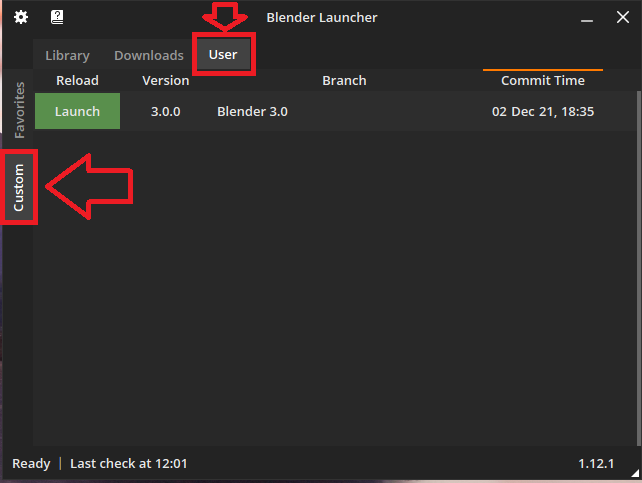
すでにBlenderをインストール済の方へ
今まで使用したBlenderの設定やアドオンを引き継いだ状態でBlender Launcherを使用するために
Blender Launcherの中にcustomというフォルダがあります
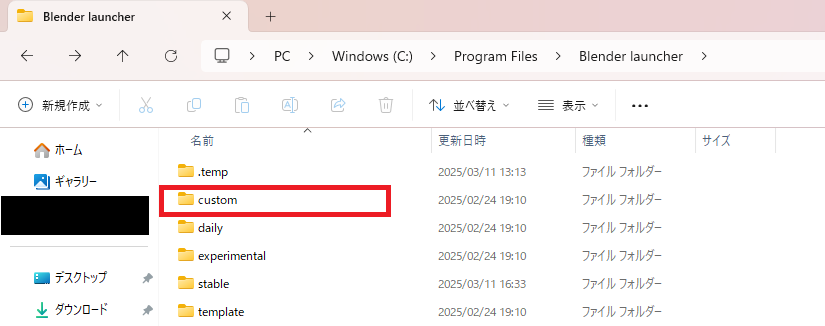
customの中にBlenderをコピペします
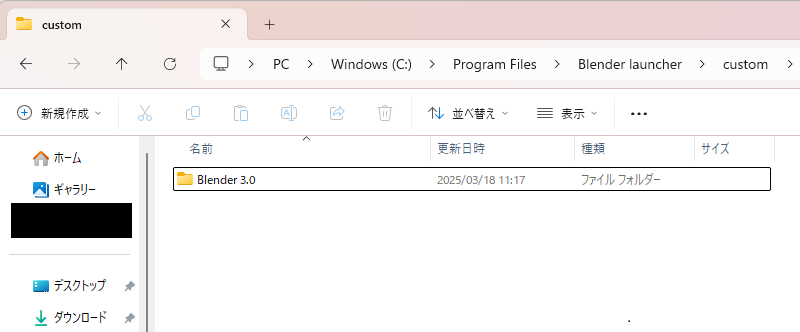
Blender Launcherを再起動し、Userタブ、Customフォルダの中にコピペしたBlenderが入っていることを確認
入っていることが確認できたら元のBlenderを削除
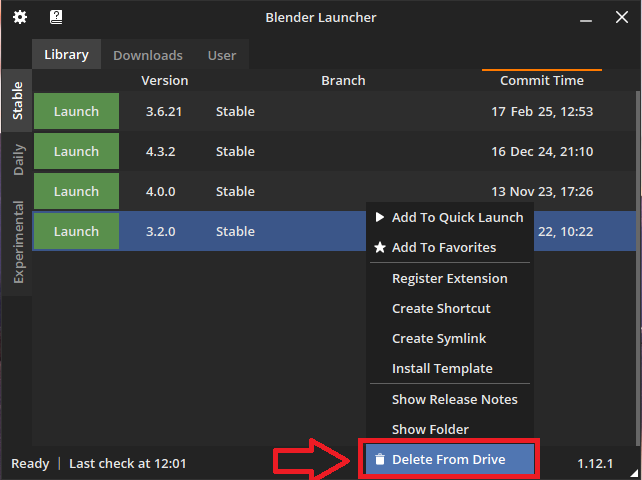
アンインストールしたい時
削除したいバージョンを選択し、右クリック
Delete From Driveを選択
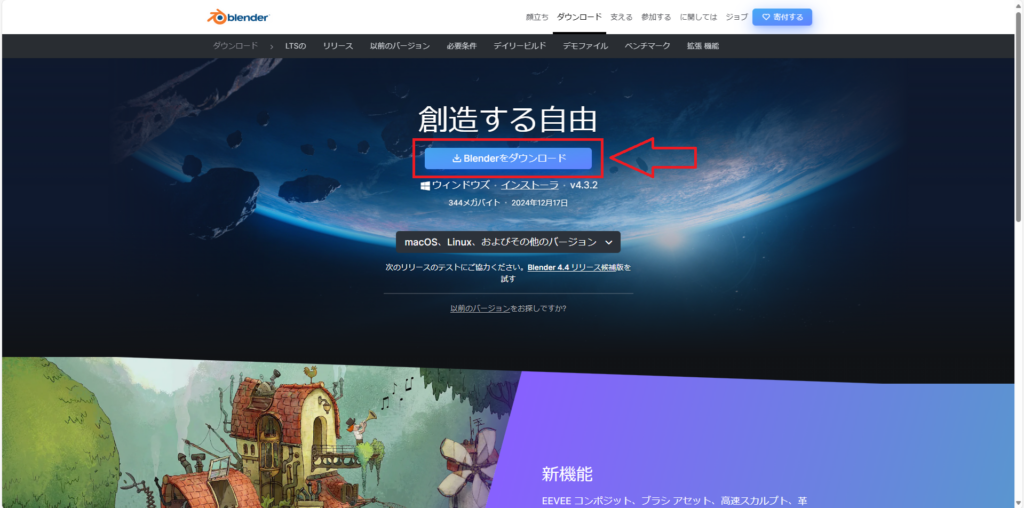
5.Blender 公式サイトからのインストールの仕方
最新バージョンを使いたい方は下記リンクよりダウンロードしてください
現在最新バージョンBlender4.3.2(’25/3)
6.Blender 公式サイトからの最新ver以外のインストールの仕方
最新バージョン以外を使いたい片へ

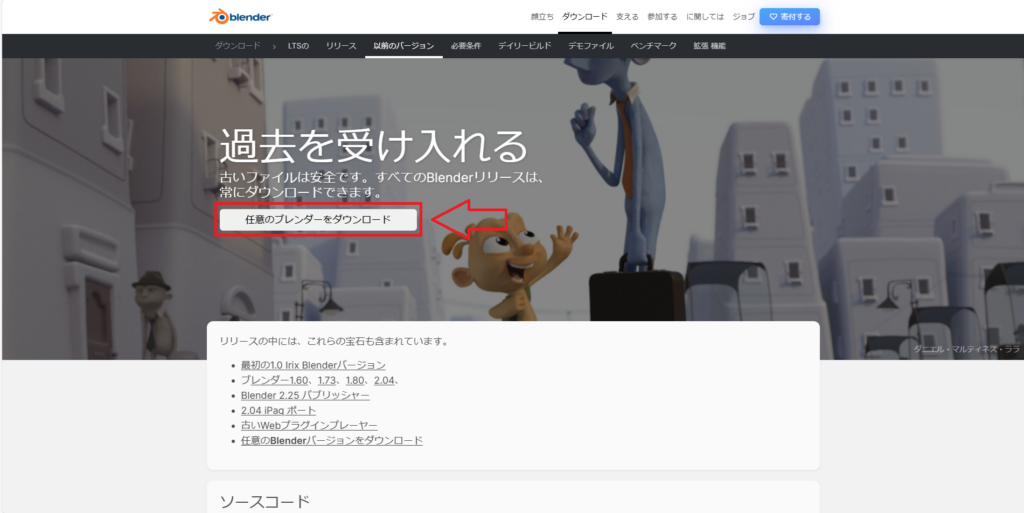
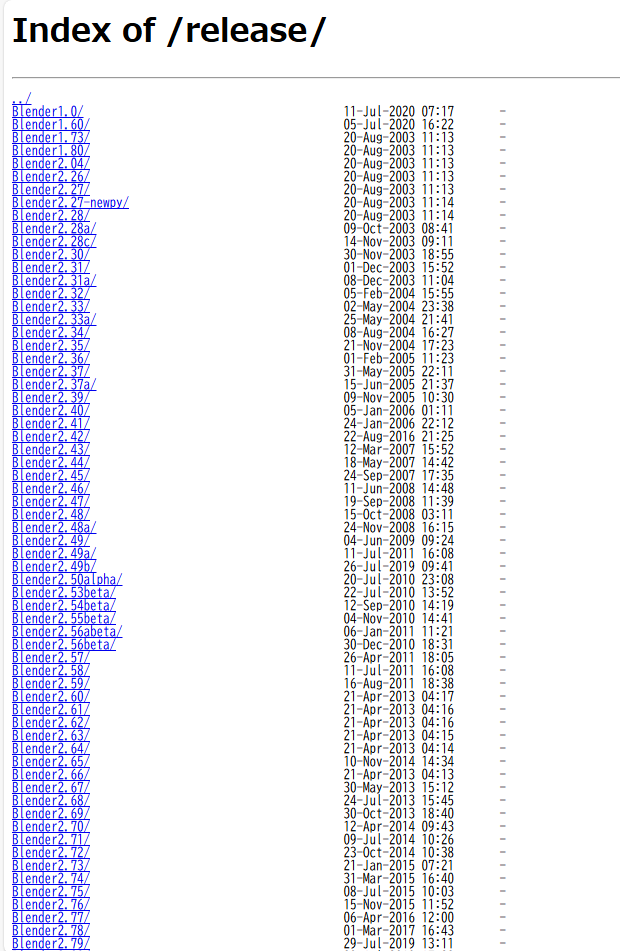
下記のページより過去のBlenderのバージョンがインストールできます
7.注意
本記事ではBlender Launcherでのバージョン管理をオススメしておりますが、バージョンを跨いでの作業はデータの破損に繋がる恐れがあります
なるべく1つのバージョンで作業を進めていくようにしましょう
8.参考
参考ブログ
参考動画
オススメ書籍

コメント